Cemented Carbide Trimmer Blades can deliver clean, consistent cuts, but only when their grade, geometry, and dimensions match the job. A blade that performs well on dense hardwood may behave differently on thin panels or abrasive composites. Even a small mismatch can leave a rough edge, increase vibration, or shorten service life. Details matter.
This guide covers seven practical checks: material compatibility, carbide grade, edge design, blade dimensions, machine fit, operating conditions, and maintenance. Look closely at the actual workpiece, not just its label. A dusty workshop, frequent stop-start cycles, and a dull-looking finish can each point to different blade needs. There is no universal choice. Some recommendations involve trade-offs, and real cutting results may challenge a neat specification sheet.
One sourcing point matters for trust: no verifiable expert name or quotation was provided with the topic. I won’t invent one or present a fabricated remark as industry testimony. A verified quotation from a carbide-tooling specialist should be added only after checking its original source. For now, the guidance here focuses on observable selection factors and careful comparison. Small differences count. Before buying, confirm the blade’s dimensions and intended use with the manufacturer or supplier. A sensible choice starts with evidence, not the promise of a perfect cut.
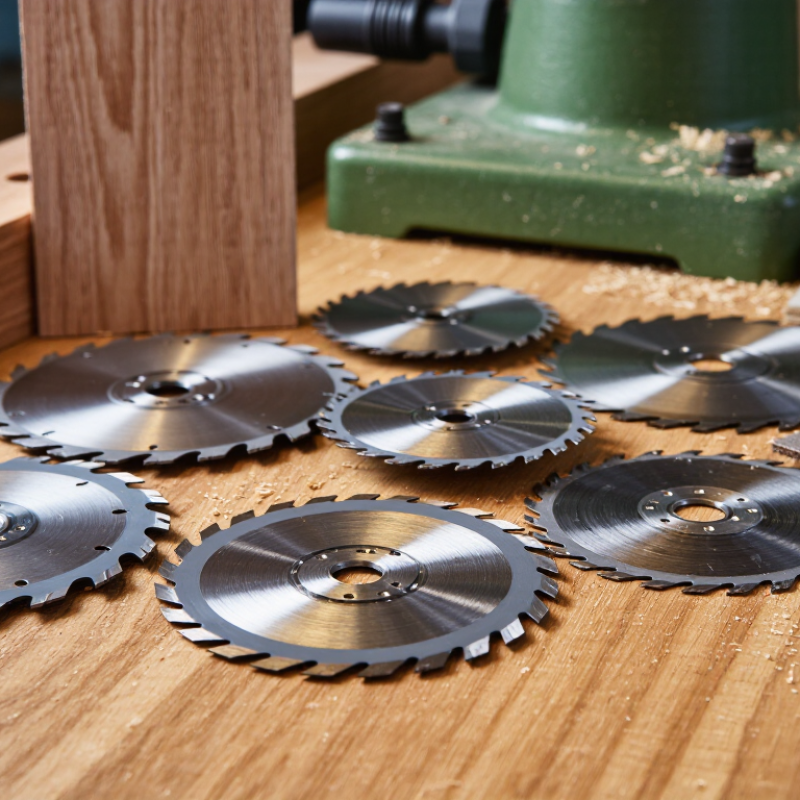
Identify the material before comparing cemented carbide trimmer blades. “Plastic” can mean soft, clean resin or glass-filled stock that wears an edge quickly. Laminates may combine a tough core with an abrasive surface. Start with the workpiece, not the catalog. Note its hardness, abrasiveness, and any fillers or coatings. Fine-grain carbide can support a sharp edge and clean finish, while a tougher grade may better tolerate impact or interrupted cuts. The trade-off matters. A very wear-resistant edge may chip if the setup is unstable.
Then define the actual trimming task. Is the blade removing a thin flash, following a curved edge, or cutting a laminate flush to a panel? Record the cut depth, feed rate, and whether the tool meets knots, joints, or changing layers. These details affect edge life and finish quality. Small chips on a finished edge can signal excessive feed, vibration, or a blade grade that is too brittle. Don’t assume the blade is the only cause. Check clamping and alignment, too. A material sample and a short test cut often reveal more than a broad material label, though one test may not represent every production condition.
Carbide grade affects how a trimmer blade handles impact and abrasion. Fine-grain grades often support a sharp, stable cutting edge, while coarser structures may better tolerate sudden shocks. Binder content matters too: more cobalt can improve toughness, but may reduce hardness and wear resistance. Match the grade to the material being trimmed and the machine’s cutting conditions, not just a hardness rating. The hardest option is not always the longest-lasting one.
Coatings can reduce friction and protect the blade, but their benefits depend on temperature, material, and edge geometry. A coating that performs well in dry cutting may behave differently when heat or abrasive dust builds up. Check whether the coating is suitable for the workpiece, and inspect the edge for chipping as well as gradual wear. Small details count. Compare blades under similar operating conditions, recording cuts completed, edge condition, and downtime. This is not a perfect test: operator technique and material variation can skew results. Still, a simple log is more useful than choosing by appearance alone. If wear concentrates near one corner, alignment or feed pressure may deserve attention before you change grades.
Tip: Match the geometry to the material and cut direction. A low rake angle can support a durable edge on abrasive stock, while a sharper geometry may reduce cutting resistance in softer material. Neither choice works everywhere. ISO 3002-1 offers a consistent framework for recording rake, clearance, and wedge angles. Ask suppliers for these values, not just a blade profile drawing.
Tip: Check dimensions against the machine and the actual cut. Confirm blade length, thickness, mounting-hole position, and allowable runout. Even a small mismatch can cause vibration or leave a ragged edge. The U.S. Geological Survey’s Mineral Commodity Summaries 2024 estimated world tungsten mine output at 78,000 metric tons in 2023. That is a supply figure, not a blade-life guarantee, but it underscores why preventing premature edge damage matters.
Tip: Choose edge configuration by workload. A single edge may suit a straightforward trim; multiple usable edges can reduce changeover interruptions, provided indexing stays accurate. For brittle laminates, test a honed edge to limit chipping. For fibrous stock, a sharper edge may leave a cleaner finish. Run a short trial on the real material, then inspect the cut under good light. I still recheck the setup after the first few parts; shop conditions can shift the result.
| Tip | Selection Factor | What to Check | Practical Guidance |
|---|---|---|---|
| 1 | Match the blade to the material | Workpiece material, hardness, abrasiveness, and whether it is solid or layered. | Abrasive materials generally increase edge wear, while hard or interrupted cuts can raise the risk of edge chipping. Select the carbide grade and edge preparation for the actual material and cutting conditions. |
| 2 | Choose the cutting geometry | Blade profile, rake angle, relief angle, and available clearance around the cutting edge. | Geometry affects cutting forces, chip formation, and clearance. Use the machine or tool drawing as the starting point; changing angles can affect tool strength and cutting performance. |
| 3 | Measure all critical dimensions | Overall length, width, thickness, hole or slot locations, and mounting features. | Record dimensions in millimetres or inches and compare them with the holder or OEM drawing. Do not assume that blades with similar outside dimensions will fit the same seat. |
| 4 | Specify edge configuration | Single- or double-sided cutting edges, bevel arrangement, and usable edge locations. | A single-sided edge may suit a dedicated orientation; a double-sided design can provide another usable edge if the blade and holder allow it. Confirm that every intended edge can be positioned safely. |
| 5 | Balance sharpness and edge strength | Edge hone or radius, bevel size, and any chamfer or protective preparation. | A very sharp edge can reduce cutting resistance but may be more vulnerable to chipping in demanding conditions. A modest edge preparation can improve robustness; the appropriate amount depends on the material and cut. |
| 6 | Check tolerances and seating | Thickness consistency, flatness, hole or slot fit, and contact with the blade seat. | Use the tolerances specified for the machine and holder. A blade that does not seat securely or sits unevenly can affect alignment and cutting results; keep the seat clean during installation. |
| 7 | Confirm operating and safety requirements | Blade orientation, rotation direction, clamping method, cutting speed, and guarding. | Follow the machine manufacturer’s installation and operating instructions. Cemented carbide is hard but relatively brittle, so avoid impacts, overtightening, and use of a damaged blade. |
Tip: Match the blade to the trimmer’s exact mounting and operating limits. Check arbor diameter, blade thickness, rotation direction, tooth geometry, and maximum rated speed. A blade that fits the arbor may still exceed the machine’s speed rating. Measure carefully; small differences matter.
Match the carbide grade to the material being trimmed. ISO 513:2012 classifies cutting-tool materials into six application groups, including non-ferrous metals, cast iron, and hardened materials. This is a useful selection reference, not a substitute for the trimmer maker’s specifications. For abrasive stock, a wear-resistant grade may last longer; for interrupted cuts, toughness can matter more. Carbide is hard, but it can chip under impact.
Tip: Check the real operating conditions. Note the workpiece, feed rate, dust, heat, and vibration. A blade used on a dusty shop floor may need different maintenance from one used in a clean, steady setup. Inspect its edge after a short trial, and check for unusual noise or heat. One detail is easy to miss: a dull blade can change cutting load, so confirm the machine remains within its rated limits.
Match blade compatibility to the trimmer and operating conditions. The bars show qualitative selection priorities on a 1–5 scale, not measured performance data.
How to use: Start with machine fit and operating limits, then consider the material being trimmed, cutting geometry, carbide grade, and maintenance needs. Confirm dimensions and operating specifications against the trimmer manufacturer’s documentation.
A trimmer blade’s long-term value starts with how consistently it is made. Check that carbide tips are evenly seated, joints are clean, and cutting edges show no chips or uneven grinding. A polished surface can still hide poor alignment, so inspect the blade closely. If possible, ask for information about the carbide grade, manufacturing checks, and recommended operating speed. Clear, specific answers are more useful than broad claims.
Tip 1: Check the fit. Confirm the bore and blade dimensions match your machine, and look for visible wobble during a careful, unpowered inspection.
Tip 2: Review the joining. Uneven brazing or gaps near a carbide tip may signal a weak point.
Tip 3: Compare the stated speed limit with your trimmer’s specifications. Do not guess.
Safety and service life matter as much as sharpness. Use the correct guard and follow the machine maker’s instructions for installation and speed. Wear eye and hearing protection; fine dust needs appropriate control, too. Small details matter. A clean test cut is not proof of lasting quality, so check edge wear after regular use. Record how many boards or work hours a blade handles before cuts become rough. Then compare replacement cost, sharpening options, and downtime—not just the purchase price. I would not treat the cheapest blade as poor automatically; actual results can vary with material and setup. Keep the inspection routine consistent.
Match the grade to the material and cutting conditions. Fine-grain carbide can support a stable edge, while coarser structures may handle sudden impact better. More cobalt can improve toughness but may reduce hardness and wear resistance.
No. Not always. A very hard edge may wear well but chip under impact. Consider both abrasion and shock when comparing grades.
Check whether the coating suits your material, temperature, and cutting conditions. A coating that performs well during dry cutting may behave differently when heat or abrasive dust builds up.
A low rake angle can support a durable edge on abrasive stock. Sharper geometry may reduce resistance in softer material. Neither choice works everywhere.
Confirm blade length, thickness, mounting-hole position, and allowable runout against your machine. Even a small mismatch can cause vibration or a ragged cut.
A single edge may suit straightforward trimming. Multiple usable edges can reduce changeovers if indexing stays accurate. Test the blade on your actual material.
Look for evenly seated carbide tips, clean joints, and consistent grinding. Check for chips or gaps near the tips. A polished surface alone proves little.
Record cuts completed, edge condition, and downtime under similar conditions. Compare replacement cost, sharpening options, and service life. Operator technique can skew results, so keep the test consistent. I still recheck alignment after a few parts.
Choosing Cemented Carbide Trimmer Blades starts with understanding the material being cut and the demands of the task. Consider how abrasive or tough the workpiece is, how often the blade will be used, and the finish required. Compare carbide grades and any surface coatings in terms of hardness, wear resistance, and suitability for the intended conditions. A suitable balance can help maintain cutting performance and reduce the need for frequent blade changes.
Next, check that the blade’s geometry, dimensions, and edge configuration match the desired cut and fit the trimmer correctly. Account for operating speed, workload, and other conditions that may affect stability or heat. Review manufacturing quality, including edge consistency and overall construction, and follow safe handling and installation practices. Rather than choosing by initial cost alone, consider expected service life, maintenance needs, and replacement frequency to assess long-term value.

Shen Gong Carbide